my favorite toddler’s favorite robe
Hi, friends! I’m in the midst of trying to conquer that most coveted of sewing projects, the Plain T Shirt (make note: I am belittling my own sewing skills here. The T shirt might just conquer me first. Heck, it might even make me call it a Tee Shirt just out of respect).
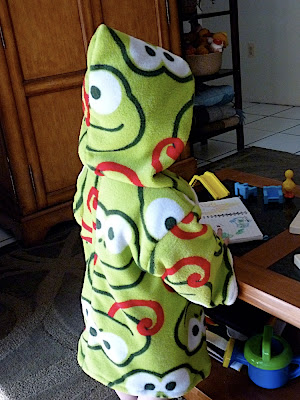
But for now I thought I’d share this fun little project. My Gracie loves her robe, and I was pleased enough with the simplicity of this one to think it might merit an hour or so of your time too!
Click here to download PDF of schematics and guidelines for Sula’s toddler robe (May 2011)
A few notes:
1) Strongly directional prints (like mine!) aren’t great, since this robe is designed to use a folded 60″ piece of material. Then again, my girl loves her frogs so nobody minds.
2) I used one of the ultra cuddle prints from JoAnn’s and was delighted both at the ease of sewing (hemming is so simple! Just turn under twice and use a slight zig zag to secure!) and how well it is washing and wearing.
3) There is no provision for a closure in the instructions. I didn’t want a tie for a toddler, although you might try velcro.
4) Consider yourself alerted to the fact that I prefer tutorials with a lot of room for personal interpretation, so this one is pretty bare bones. That said, it is also quite simple so I feel confident you be fine.
5) Downloading this PDF indicates your agreement to use it only for personal use. Make nice with the blog and the blog will make nice with you.
6) Let me know how it goes! I’d love to hear from you.
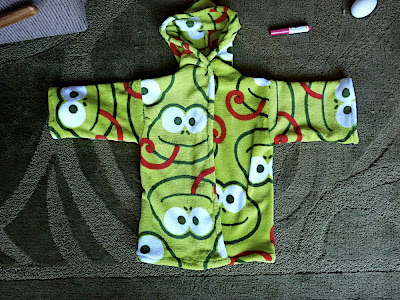
front view, closed
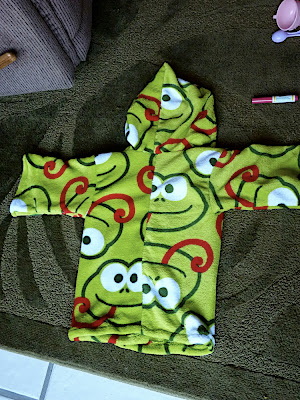
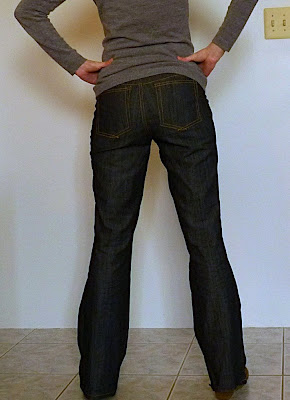
back view
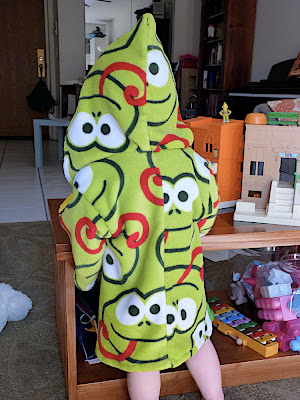
on my willing model, with the hood up
Jalie jeans have become my wardrobe’s lifeblood
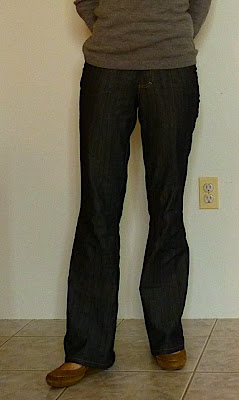
I think by now we can admit I have a deep-seated love for the Jalie jeans pattern. Ha ha.
This pair has been cut out for almost a year, and it took a real-life sew-a-long with a real-life friend to get me moving on them. It was great fun to begin this venture with her, although we had to part with our pants still in parts. She assures me hers were a great success, and that she’s already contemplating her next pair. These jeans are dangerous, I tell you!
I don’t have much to say about this pair. It’s a really thin denim but so far has held up quite well to repeated washing and wearing. I used topstitching thread on this pair and it made a big difference. I also like my back pocket design. I did double lines all around, but let them cross at the bottom point. I’m a big fan of simple with a twist.
My only disappointment is that the fly doesn’t lay as flat as it should. I’ve made these pants four times now, and the first two fly insertions were perfect while the last two have been less than. Am I overconfident? Over-thinking it? Over-particular? I think the next time I make these pants (you knew there was going to be a next time!), I’ll try a different method, just to see.

making faces at Gracie. I thought a rare photo that actually looks like me deserved a showing on the ol’ blog.
The Conference Suit

Over the years, I’ve found nothing counters the stress of writing (for academic purposes, that is) better than creating something tangible. My original blog came about from that very discovery. Thus, confronted with a paper to write and deliver at my professional society of choice’s annual meeting, it seemed only logical to me that I should make my suit for the conference, too.
(One might argue that in reality, nothing increases the stress of writing a conference paper than deciding to make the suit to wear to deliver that paper, but as you may have noticed I prefer to ignore logical logic.)
Wearing suits usually makes me feel like I’m playing dress up. I don’t usually wear them, they tend to be more conservative and/or formal than I need, and they never, ever fit me well. This one isn’t tailored or anything, but I think it avoids all of those. I actually ended up being a bit overdressed. (Oh well. I also read my paper too fast, because my session started 8 minutes late and guess who was the junior scholar on the panel.)
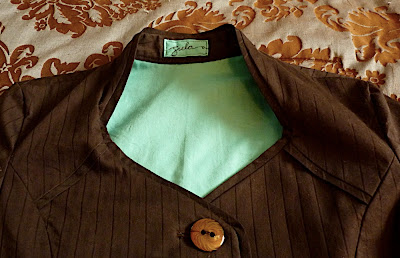
I got a great dark dark brown cotton with a subtle stripe at Winmill fabrics (for $5 a yard! And I would have paid $10!). It pressed well and had a nice feel to it, but I chose to underline for a more structured look to the jacket. I ended up underlining with a sheet I bought on clearance at Target for making muslins. Who knew?
The jacket is New Look 6867, with a lot of modifications. I made two muslins to get the fit of the princess seams so it didn’t overwhelm my small-ish top half. I also added flat piping from the fabric on the bias. Most importantly, I added a seam to cut across the fronts from the neckline to the underarm. I was drawn to the neckline in the first place, and this highlights it further.
I lengthened the sleeve from three-quarter to full. My modifications require me to mess with the armhole, and I ended up with a very non-traditional shaped cap. It worked–I don’t know how–but it has emboldened me to experiment a bit more in this vein. My mods ended up making the sleeve too short with a traditional hem, so I separated the outer layer from the underlining for a few inches at the bottom and just sewed them together. I like the bit of spice the underlining adds when I gesture, which made air quotes more tempting than usual as I delivered my paper (don’t worry, I resisted the temptation.)
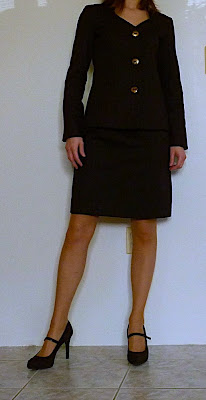
The buttons are the best I could do with a very pathetic selection at you-know-where. This is pathetic, because I live 20 minutes away from Windsor Button, but sometimes being done is more important. I can always change ’em, but I have to admit the bit ‘o bling is growing on me (especially now that I’ve seen pictures).
The skirt is just a straight skirt. I’m quite proud of it, though, because this is my first one and I figured out how to add a lining. And do a nearly invisible hem, yesssssss.
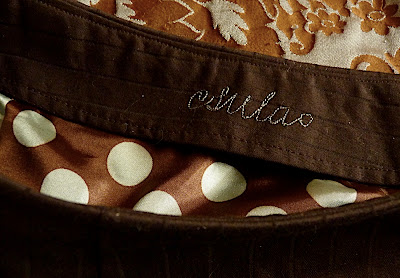
And, because I was happy, I signed ’em both.
PS The most amusing anecdote regarding this ensemble is that I met a fellow scholar from Ireland. As we were discussing our work, he suddenly said in his delightful Northern Irish accent, “I have to ask, where’d you get your kicks?” Which was funny, because I’d picked them up on clearance ($25) at the last minute at a JCPenney’s in the middle of nowhere Tennessee while curtain shopping with my mother-in-law. And I hadn’t brought my wallet, so she bought them for me. Still need to send her a gift card to make up for that!
PPS I have to be the most awkward model ever. Any tips for good self-timing shots?
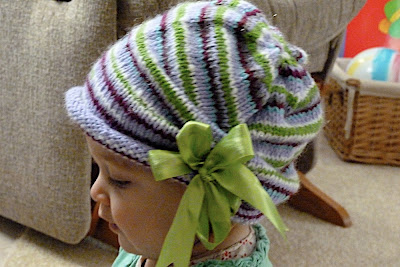
Somewhat Matching Minty hats
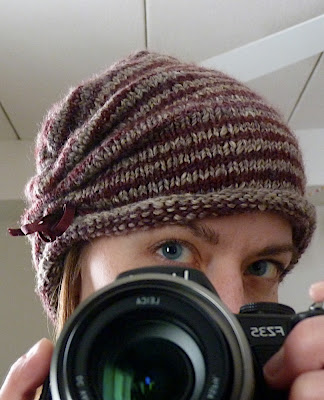
Desperately in need of something warm to cover my ears this winter, I resolved to use some leftover handspun (I know!). Happened across this pattern (Knitty link), which suited my purposes perfectly. Knitted up easily, turned out fine, keeps my ears warm. That should be the end of the story, but…
of course, it also turned out to be much cuter on Gracie, so I decided to raid the leftover stash and see if I couldn’t come up with one for her.
The pure bliss of knitting one’s handspun aside, hers was much more fun to knit. First of all, I ignored the pattern because guess what! Knitting has holes, and thus the effort of making eyelets is preeeeetty much wasted if you are planning to use ribbon instead of icord. Can you tell the difference?
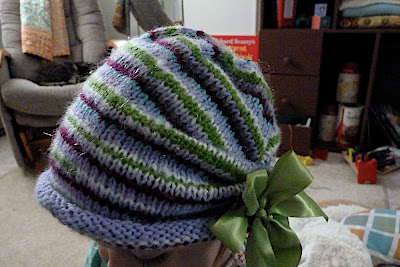
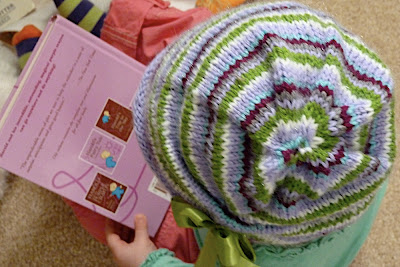
Second, since I was using teeny bits of yarn I just added them randomly and knit in a spiral to avoid a jog. I was hoping the decreasing at the top would make this spiral more evident, but it’s a little less than whelming. I think the overall effect is good, though, especially since random is hard for me. There’s something about this hat that makes it look less homemade than my usual efforts, and I think it is the random striping.
And here she is! Obviously she in hers is much cuter than I in mine. This is how it should be.
Child’s placket neck pullover, in stripes
Gracie and I read together, I knit, and she gets a new sweater out of the deal. Sounds like heaven to me!
A child’s placket neck pullover in Lily Chin Chelsea (rav links), purchased ages ago at a serious discount. I like that the pink and gray is just a little hint of “girl” in a neutral style.
Easy to knit, easy to wear. Winner!
(not to easy to photograph)


Mashup sweater
Why is it that my projects have these extended back stories? I started this sweater somewhere in the spring of 2008 with leftover yarn from a felted bag I’d designed for my mom. My intention was to use the chart from Venezia and the basic pattern of the Road to Golden Sweater. The weird thing is that a fellow blogger (who is exactly my age minus just a few days) had the exact same idea, except hers is kind of way cooler–check it out! The other irony of this mashup mixup is that apparently this sweater killed both of our respective mojo, since mine sat unfinished, armhole-high for years, and Stella hasn’t blogged since her FO report in 2008.
I know why I stopped. I realized that I didn’t have enough yarn for sleeves. I can’t believe it took me two years to figure out that I should just forget about making sleeves, then! In the interest of getting on with things, I picked it up again this fall and finished the durned thing in no time flat (naturally).

And here’s where I need help: First, a woolen short-sleeved sweater is surprisingly warmer than I expected. So what do I wear it with? Jeans? Ok.

Second, I can’t help but think that the inside, with all of the strands stranding into a reverse pattern, is much cooler. What do you think?

Did you forget I had a blog?
Well, me too. Not in the sense that if someone had asked me if I blog, I’d have had to turn my head and squint before acknowledging that I thought so, but rather in the jumble of days tumbling over weeks pell mell I have completely forgotten to talk to you. Which is a bit strange, since you (as “the blog”) tend to be the recipient of several sewing- or knitting-induced internal monologues over the course of a project.
Next thing you know, someone is going to tell me that mental emails don’t work either. Pshaw.
In the meantime, I left you with the slightly vague and slightly whiny notion that my sewing machine was broken again. Which is how I ended up with this.

Turns out, my old machine really was broken, and when I took it to a real repair person (as opposed to the flat fee guy in Quincy who it turns out equated “oiling” with repair–caveat emptor) it came back in better shape than I’ve ever seen. Who knew the Singer Stylist came with stretch stitches? And it turns out that the machine I bought on Ebay without a power cord (for $10! Plus $17 shipping, but still) while deciding whether to pony up for repairs actually does work, and minus the minor break I inflicted on it when trying to “fix” it, it works very well. I’m a little bit delighted to have two of these gems, even though it is rather excessive. Turns out I’m ok with excess if it comes in 1970’s appliance beige.
Newborn Candy Corn costume pattern
What could be sweeter than a three-week-old baby candy corn? Last year I had Grace’s first Halloween costume planned almost as soon as I found out I was due in October. Even before I knew her name. Or that she was a her. But “planned” is the key word in that sentence, because I didn’t end up making this until after she was two weeks old and Halloween was days away. And did I mention she wanted to be held for about 20 hours a day? So I designed this easy bunting, which can be made in one and a half naps (although I make no guarantees, if your newborn sleeps like Gracie did–or didn’t–at that time!).

If you know a newborn in need of a simple and sweet costume this year, here’s my suggestion! Click here to download my PDF pattern and instructions (sorry for the page by page. I wanted to make sure it maintained proper dimensions and Word wasn’t cooperating):
Sula’s Newborn Candy Corn costume instructions
A few notes before we begin:
Firstly, this candy corn bunting is designed to be worn as a costume only. It is not intended to be worn for sleeping or extended time periods. My goal was to make it simple to sew, and easy to take on and off the baby.
And keep in mind that I am not a designer, so by downloading this pattern you are agreeing to take your costuming in your own hands, and to exercise your slack-cutting abilities in regards to me. In other words, no whining! (That being said, shoot me an email and I’ll try to help however I can if you get stuck somewhere. Because we all know it’s not you, it’s me.)
Secondly, Grace was about 8 lbs. when she wore this. You may want to measure a current sleeper against my pattern to make sure it is long enough.
Thirdly, I ended up adding darts at the tie line on my original costume, but in my test run as I was writing up this pattern I couldn’t figure out why I needed them. The bunting is simple enough that you don’t really need any shaping. If someone makes this and finds that you DO need the darts, please let me know so I can amend the pattern for others!
Fourthly, this pattern is for personal use only. In a similar vein, do not use my daughter’s pictures, but feel free to link to this page.
Enjoy, and I’d love to see your finished project in action! Or just send candy…
A meta moment
I come and go as I please on my blog, and I must thank those of you who continue to read for tolerating my apparently capricious posting. My grandmother passed away rather unexpectedly almost a month ago, and losing her made me want to retreat from the big world a bit. So I did, bargaining with myself that I would return again when I could type that sentence. I couldn’t move on with my usual tripe without attempting to come to grips with the loss, but I dreaded acknowledging it in general and here in particular, where words can seem simultaneously too ephemeral to pay adequate tribute and yet too wide spread for something so personal.
Apparently today I am getting ready to return, although what I haven’t figured out how to express is how much she meant to me. I’ll just thank you in advance for your kind thoughts and prayers for my family and promise to come back soon with a little bit of stitching.
Baby shoes, sewing blues
The good this week: more baby shoes!

It’s pretty obvious that I am obsessed with making baby shoes. I’m just not satisfied with the shoes available for purchase, finding that they are either too stiff, too difficult to get on, too easy to get off, too big, too little, too ugly, too cute, too expensive–gee, am I picky or what?
So I’ve decided to undertake making my own. I used my experience with the cloth baby shoe pattern (which I still love for small babies, by the way) to draft my own pattern based on Gracie’s foot. It continues to amaze me that she is so NOT one-size-fits-all, down to her little narrow heels. Her adorable, sweet, precious little heels. (A little over the top? Hardly!)
My areas of concern: fit, easy to put on (for me), hard to get off (for her), easy to wear, cute without being cutesy, durable for wearing and washing, completely finished on the inside.

Here are my test shoes. I used a microfiber imitation suede for the outer, lined with flannel on the uppers and a sherpa-ish material on the sole. I also interlined the sole with canvas for a little more protection on the playground. There is elastic in the back, and I won’t have ribbons for the final version. It’s a pretty sturdy little shoe, although I hear tell of a leather stash at my mom’s that I may or may not raid when I’m there next month…
And now for this week’s bummer: my beloved sewing machine broke again. That’s the third time in less than a year, which tells me a) there’s something seriously wrong, and b) my $45 flat rate repair guy–we’ve visited him twice already–isn’t up to the job. What’s a girl to do? I’m entertaining the idea of buying a cheap-o machine to get me through and learning how to repair my machine by myself. I could really use your thoughts and advice! No sympathy necessary, though, since I’ve already invested a good part of the last two days in feeling sorry for myself. 😉


